What is a Brush Materials?
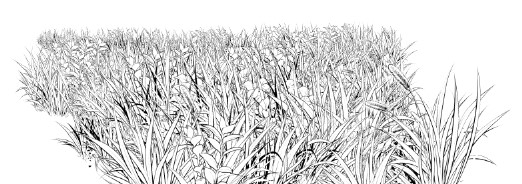
Brush materials can draw bulky items in a short time,
such as natural objects, action effects,
frequently appearing accessories and more with just stamps and stroke.
Also, by combining various brush materials,
it can create complicated picture in a surprisingly short time.
・EXAMPLE
Black smoke that drawn with strokes only.

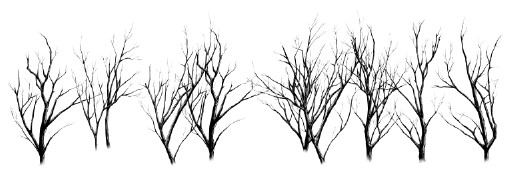
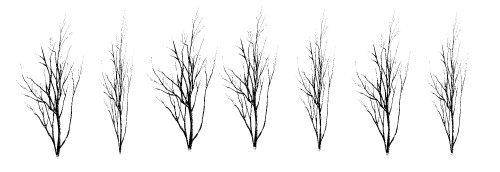
Tree that drawn with combination of 3 differents brushes.

Back to Content
Basics Setting
Select the pattern brush(blue frame) from the tool window
to display the pattern brush tool property.
※ The size’s number that using here are millimeter (not pixel).
Click the spanner button (red frame) which at the lower right corner,
and the sub tool detail screen as shown below will be display.
Click into Brush tip (blue frame) to display the thickness and
direction setting.
Click the left blank space (inside the blue frame) to display the eye mark.
Then setting item will add into the tool property.
Basic preparation is now complete.
Back to Content
Basics of Size
●Size setting
First of all, we will set the size as basic preparation.
Change the brush size as shown as in the red frame below.

Adjust the brush size by clicking up and down arrows (small blue frame)
or shift left or right in the bar (big blue frame).
Or by enter the desired number of size.
●Customize the size
Click the mark in red frame for more detailed customization,
open Brush Size Effect Source Setting.
Check the pen pressure inside the blue frame and adjust the minimum value.
In the setting below, you are possible to control the size
from 80% to 100% with pen pressure.
Adjust inside of the green frame when fine setting of pen pressure is required.
Then continue draw with brush by using this setting.
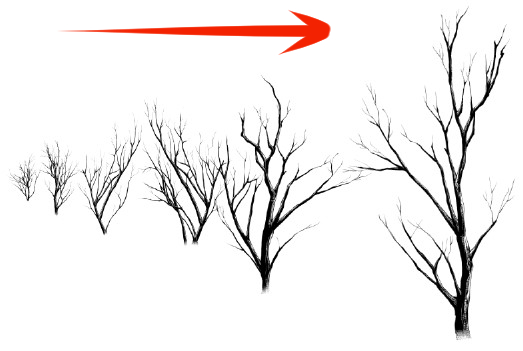
Example, set the brush size to 100 and the minimum value to 0.
Draw stroke by increasing the pen pressure from left to right.
In this way, the object got a perspective view with only one stroke.
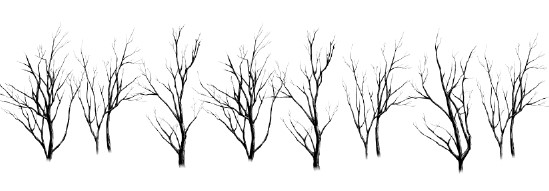
Next, select random and set any minimum value.
Normally shape with same size is like this,

It will changes randomly to various sizes automatically.
Pen pressure setting can be apply on fine adjustment and perspective objects,
random settings are effective for objects that do not need a perspective position.
By trying to draw with various settings,
it will be possible to increase variations when using brush materials.
Back to Content
Basics of Gap
●Gap setting
The gap setting is shown as below.
The mark in the blue frame towards to the right, the higher the density of gap.
You can see the preview in red frame is changing.
The setting of the numerical value can be done only when the fixed mark of the left end (the blue frame on the left) is selected.
The lower the number, the narrower the gap; the higher the number, the wider the gap.
●Customize the gap
Select the gap fixed mark (blue frame), click the mark in the small red frame (next to the size number) to display the fixed value effect source setting.
When you check the pen pressure, objects that are drawn normally with even gaps are…
the gaps changed under the influence of pen pressure.
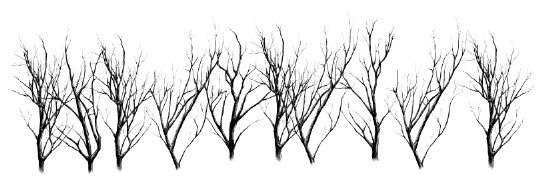
Next, set it randomly.
The gap change randomly.
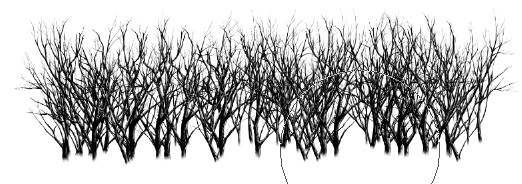
If the function of the gap is too dense like this, you can adjust unnatural objects.
On the other hand, it is an effective and fast tool for dense object.
Back to Content
Basics of thickness
●Thickness setting
The thickness setting will be shown as below.
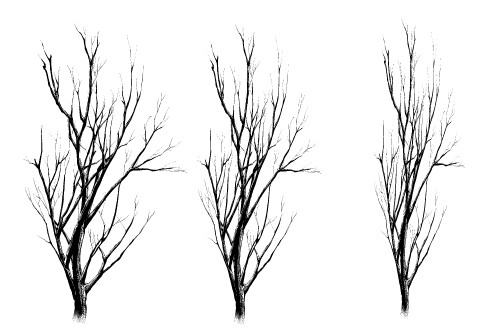
By changing the thickness, variation of the object shape appears.
●Customize thickness
Since it is troublesome to change the thickness of an object one by one,
we will customize the thickness setting.
Here is the explanation for easily customize random size.
Click the mark inside the red frame, select the random and set the minimum value with any value.
In the setting shown above, the thickness is randomly drawn between 30% and 100%.
Objects of various thickness were automatically rendered with one stroke.
Because the pattern brush is a material based on a large amount of drawing,
customization of the thickness can change shape in a very effective function to prevent pattern unification.
Basics of Direction
●Direction setting
The direction setting is done from the items in the figure below.
By changing the value you can see that the preview in the red frame is rotating.
To check the preview in large size, click the spanner mark in the lower right corner of the tool property.
You can check the direction of the brush from the sub tool details screen.
●Customize Direction
Customize direction makes material can be used more conveniently.
In this section, we will focus only on item that are easy to customize.
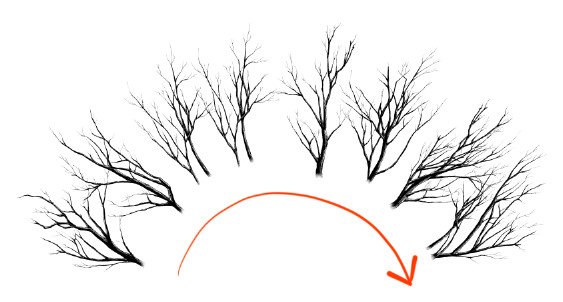
Set the direction number to 0 and click the mark in the red frame to select the direction of the line.
The direction of the object changed with the red arrow stroke.
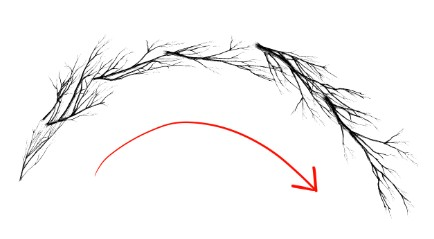
Next, change the direction of the object to 90 degrees.
The direction of the object changed with the red arrow stroke.
Next, check the most versatile random check.
The higher the numerical value of the Degree of effect, the higher the turning degree.
To lower the degree of rotation, lower the Degree of effect.
The range of the slope has become smaller.
You can change the same object shape by tilting.
Direction customization is a very practical function to prevent pattern unification as well as size, spacing, thickness.By using these functions you can make brush material more useful.
Please try using it by all means.
Back to Content